


Baked-on Oven Grime: How to Remove it
April 14, 2021 - Cleaning, Home Cleaning, Oven Cleaning
Baked-on oven grime is one of those problems that tends to be ignored until it becomes impossible to. Light grease splatter builds up over weeks and months, each cooking session adding another thin layer that hardens and darkens under heat. Eventually the oven smells, smokes, and looks significantly worse than it should, and the build-up that took months to accumulate resists the quick wipe-down that would have handled it early on. There is a safety angle to it as well. Fire and Rescue NSW warns that a build-up of grease and fat can ignite, and advises keeping your oven, rangehood and grill clean and in good working order.
The good news is that baked-on grime does respond to the right treatment, applied correctly, with enough time. The key word is time. Most DIY oven cleaning failures come down to not giving the cleaning agent long enough to soften the residue before attempting to remove it.
This guide covers the most effective methods for removing baked-on oven grime, from grease on the cavity walls to burnt residue on racks and door glass, and explains when the build-up has gone beyond what home methods can reliably address.
What Makes Baked-On Oven Grime So Difficult to Remove?
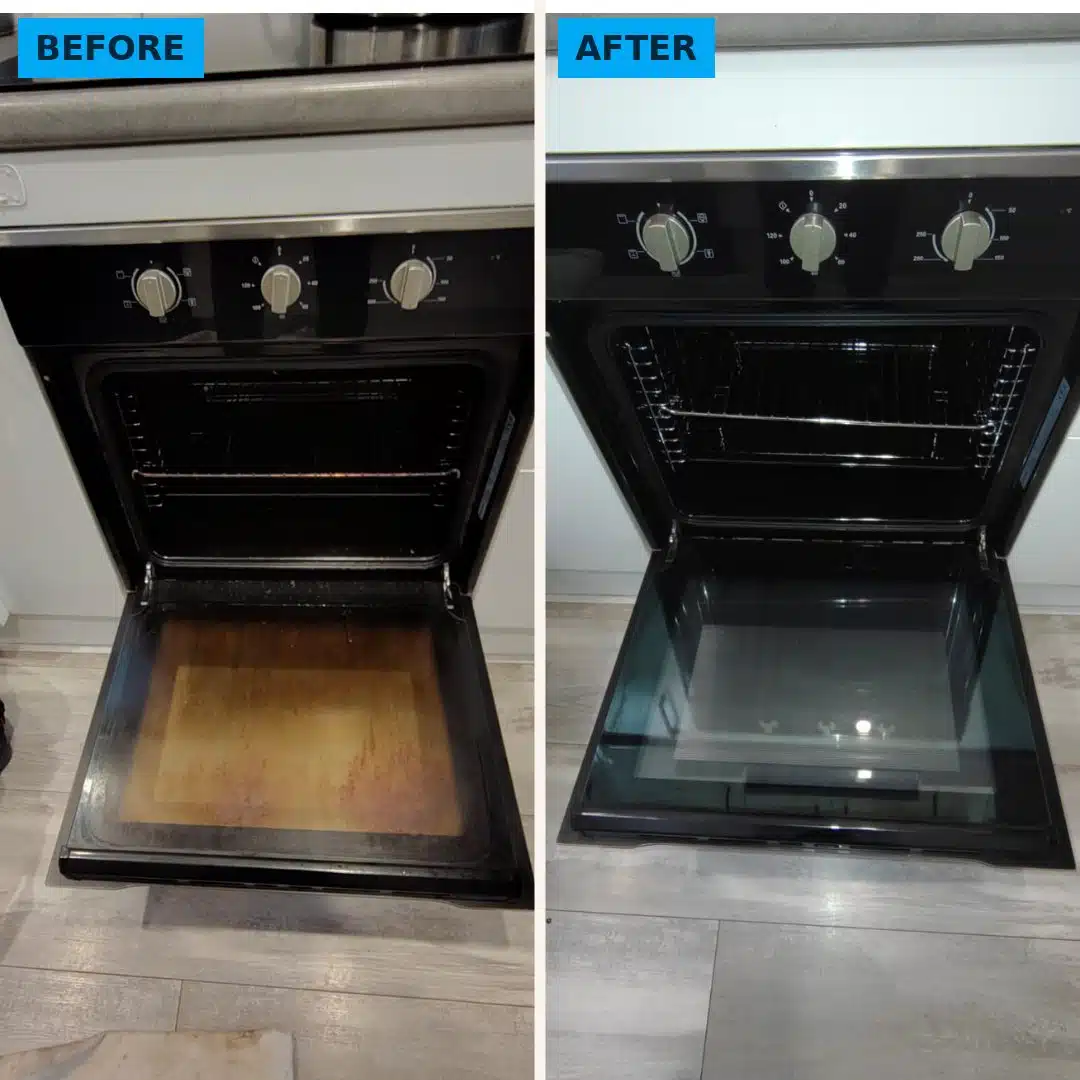
Ordinary food grease and splatter becomes significantly harder to remove once it has been exposed to sustained heat. The process works in stages:
- Fresh grease and food residue: relatively easy to wipe away with a damp cloth while the oven is still warm.
- Dried grease: requires a cleaning agent to penetrate and soften before wiping. Responds well to baking soda paste with adequate dwell time.
- Baked-on grease: has been heated and re-heated repeatedly, forming a hardened layer that bonds with the enamel surface. Needs prolonged chemical dwell time and often mechanical help to lift.
- Carbonised deposits: years of layered grease that have become black, hard carbon. The most difficult to remove DIY, and the most common reason professional cleaning is needed.
Understanding which stage the grime is at helps you choose the right method and set realistic expectations for the result.
The single biggest factor in whether a DIY clean succeeds is how long the cleaning paste has been left to work. Baked-on grease that has been through dozens of heating cycles cannot be softened in 20 minutes. It needs sustained contact time, ideally 12 to 24 hours, to start breaking down. Homeowners who wipe too early, find the paste ineffective, and conclude that the method does not work are almost always cutting the dwell time short. The chemistry is sound; the timing is the variable.
Before You Start: Preparation
A few minutes of preparation before applying any cleaning product makes the process more effective and prevents secondary mess.
- Allow the oven to cool completely. Never apply liquid or paste to a hot surface.
- Remove all racks, trays, grill inserts, and loose accessories for separate cleaning.
- Lay old towels or newspaper around the oven base to catch drips.
- Use a plastic scraper to remove any loose crumbs, large food debris, or flaking residue from the oven floor.
- Open a window or run the range hood before applying cleaning products.
For gas ovens, confirm the gas supply is off before starting. Do not apply cleaning products near the burner ports or gas connections.
We always remove loose debris with a plastic scraper before applying any paste or liquid. Wet paste mixing with dry crumbs creates a thicker residue that is harder to wipe away and obscures the surfaces you are trying to clean. Two minutes with a scraper and a dry cloth before starting saves time at the wiping stage.
Method 1: Baking Soda and Vinegar for General Baked-On Grime
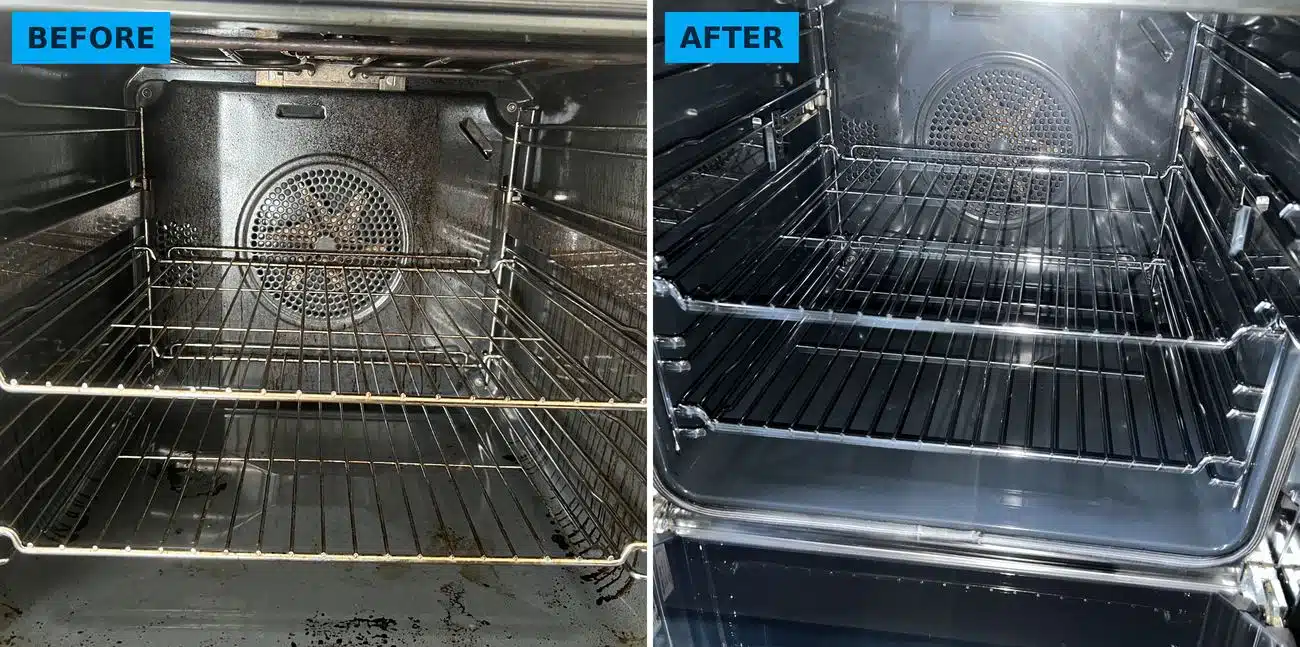
This is the most reliable all-round method for household oven grime. Baking soda’s mild alkalinity breaks down grease and lifts stuck-on residue, while vinegar’s acidity reacts with the dried paste to help loosen it during the wipe stage.
Best suited to:
- General oven wall, floor, and ceiling grime
- Moderately baked-on grease that has not yet hardened into carbon
- Oven door frames and interior edges
- Ovens cleaned at least once in the past year
How to Apply
- Mix two parts baking soda to one part water to form a thick, spreadable paste.
- Apply the paste generously across all interior oven surfaces (walls, ceiling, floor, and door frame), avoiding heating elements and the oven light.
- For heavy grime areas, apply the paste thickly and cover with a damp cloth or plastic wrap to prevent it drying out and losing contact with the surface.
- Leave for a minimum of 12 hours. Overnight is the standard. For ovens with significant build-up, 24 hours produces noticeably better results.
- Spray white vinegar over the dried paste using a spray bottle. The fizzing reaction helps break the paste away from the surface along with the softened grime beneath it.
- Wipe clean from the top down using a damp microfibre cloth, rinsing the cloth regularly.
- For any remaining spots, spray with vinegar, wait five minutes, and wipe again.
- Wipe the interior once more with a clean damp cloth to remove all residue before using the oven.
For ovens that have not been cleaned in over a year, a single overnight soak rarely removes everything, particularly on the oven base and lower walls where grease pools and carbonises. A second application after the first wipe, left for another 12 hours, often removes a significant additional layer. Plan for a two-stage clean on heavily neglected ovens rather than expecting a single treatment to resolve everything.
Method 2: Hydrogen Peroxide Paste for Stubborn Grease
Adding hydrogen peroxide and dish soap to the baking soda base increases the cleaning power without introducing harsh fumes. This combination is more effective against grease-heavy residue that the standard baking soda paste has not fully addressed.
Best suited to:
- Grease-heavy deposits that resisted a standard baking soda clean
- Greasy chunks or build-up on oven walls
- Door glass with brown or opaque grease deposits
- Stubborn marks on oven racks and trays
How to Apply
- Combine two parts baking soda, one part hydrogen peroxide (3% standard pharmacy grade), and one part dish soap.
- Mix to a thick paste. The consistency should be similar to the standard baking soda method.
- Apply to affected areas and, optionally, add several tablespoons of lemon juice to the oven base for additional degreasing and odour control.
- Leave for 15 to 20 minutes for lighter grease, or overnight for heavier deposits.
- Wipe clean with a damp cloth. Use a plastic scraper for any remaining thick deposits, never a metal blade on enamel.
This mixture also works as a multi-surface kitchen cleaner for splashbacks, stovetops, and benchtops if you have some left over.
Use standard 3% hydrogen peroxide, the grade available from pharmacies. Higher-concentration hydrogen peroxide is not necessary for household oven cleaning and can damage enamel coatings. The dish soap component is important for grease because it acts as a surfactant, helping the cleaning solution penetrate and lift the greasy residue rather than just sitting on top of it.
Method 3: Targeted Treatment for Specific Problem Areas
Different parts of the oven accumulate grime differently and respond best to slightly different approaches.
Oven Door Glass
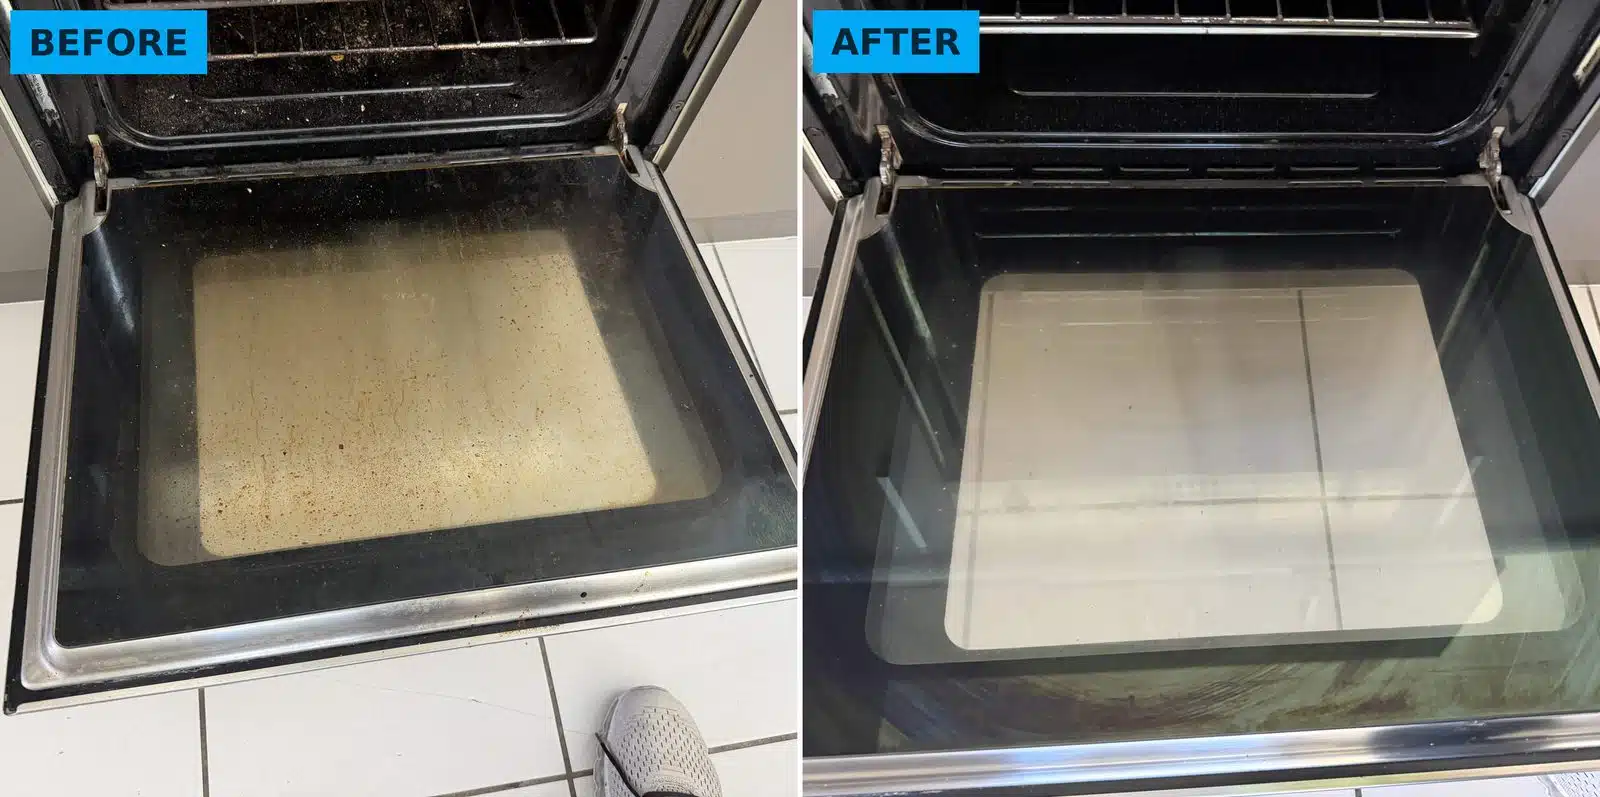
The door glass collects grease splatter that hardens into an opaque brown film. The glass is less porous than enamel, so it generally responds faster than the cavity walls.
- Apply baking soda paste or the hydrogen peroxide mixture directly to the interior glass surface. One caution here: CHOICE advises against using bicarb soda on oven door glass because it can be abrasive, and some manufacturers put a protective coating on the glass. If you are not sure about your model, use the hydrogen peroxide mixture on the glass and keep the baking soda paste for the enamel.
- Leave for 15 to 30 minutes. The glass does not need an overnight soak in most cases.
- Wipe with a damp microfibre cloth.
- For hardened grease that does not lift, use a plastic scraper held flat against the glass to slide under the residue. Never angle the blade. This risks scratching.
A common issue we encounter is grease sitting between the two panes of door glass rather than on the accessible surface. This is visible as a brown haze or streaks that cannot be reached from either side of the door. Cleaning the glass surface will have no effect on this. It requires partial disassembly of the oven door to access the inner pane. If your glass appears cloudy after cleaning both surfaces, this is likely the cause. It is one of the more frequent reasons customers call us after attempting a thorough DIY clean.
Oven Racks
Racks accumulate their own grease and burnt-on residue that the oven cavity methods do not reach effectively. Soaking is the most reliable approach.
- Lay an old towel in the bathtub to prevent scratching.
- Place the oven racks on the towel.
- Fill the tub with very hot water and add a generous amount of dishwasher detergent or laundry powder.
- Alternatively, coat the racks with baking soda paste or the hydrogen peroxide mixture before adding water.
- Leave to soak overnight.
- Scrub remaining residue with a non-scratch sponge or stiff brush.
- Rinse thoroughly and dry completely before returning to the oven.
Chrome oven racks with worn or flaking plating should not be soaked for extended periods in very hot water, as this can accelerate deterioration where the chrome has already lifted. For racks in this condition, a shorter soak combined with a degreaser spray is a gentler option. Always dry racks completely before reinserting. Wet racks returned to the oven encourage rust at the joints and worn areas. Also rinse the bathtub thoroughly after removing the racks, as loosened grease can leave a film on the bath surface if left to dry.
Oven Corners, Edges, and Hinges
Corners, the door hinge fold, and the junction between the oven floor and walls accumulate residue that a cloth cannot reach easily.
- Use an old toothbrush or small stiff brush with baking soda paste for corners and edge joins.
- For the hinge mechanism, work the brush into the fold carefully. Do not force it or apply excessive pressure to the hinge.
- Cotton swabs are useful for narrow gaps around the door seal and control area edges.
- A plastic scraper is useful for the oven floor where grease has pooled and dried flat.
The hinge fold at the bottom of the oven door is one of the greasiest areas on any oven and one of the most consistently missed. Grease runs down the door interior during cooking and pools in the hinge recess. Over time this becomes a dense, concentrated deposit. An old toothbrush with a small amount of concentrated paste and some patience clears this area well, but it takes several minutes of deliberate work, not a quick wipe.
Heating Elements
Do not apply paste or liquid cleaning products directly to heating elements. Wipe carefully with a barely damp cloth only after the oven has cooled completely. If a heating element has visible damage, discolouration, or unusual deposits, have it assessed by an appliance technician before using the oven.
Preventing Baked-On Grime From Returning
The easiest oven grime to remove is the kind that never gets the chance to bake on. A few consistent habits significantly reduce how quickly residue builds up.
- Wipe fresh spills and splatter once the oven has cooled after cooking. A damp cloth handles most light residue within minutes of cooling.
- Use a roasting tray or foil-lined baking sheet under dishes that bubble or spill over.
- Cover foods that splatter. Loosely tented foil over a roasting tin keeps most of the mess contained.
- Check whether your oven is compatible with a reusable oven liner on the floor. A liner catches drips before they bake onto the enamel and is far easier to clean or replace than the oven base.
- Run a lemon steam clean monthly: place an oven-safe bowl of water and lemon juice in the oven at 120°C for 30 minutes, then wipe the interior while warm.
A simple maintenance schedule keeps the job manageable: wipe after each use, a baking soda paste clean every one to two months, and a professional deep clean annually or when DIY methods stop keeping pace with the build-up.
When DIY Methods Are Not Enough
Most household oven grime responds to the methods above when given adequate dwell time. Heavy build-up is also more than a cleaning problem, and it is worth understanding why a dirty oven is dangerous before deciding to leave it. The situations where professional cleaning is the better option are:
- Carbon deposits: black, hard layers that have been heated repeatedly for an extended period. These are beyond what baking soda chemistry can dissolve and require professional degreasers with extended dwell times and mechanical tools.
- Grime between the door glass panes: not accessible from either door surface without disassembly.
- Heavy, multi-year build-up across all surfaces: a single DIY session is unlikely to restore the oven to a usable condition, and repeated aggressive scrubbing risks damaging the enamel coating.
- Oven still smoking after a thorough DIY clean: the residue source is often in a hidden area such as behind door panels, in the hinge mechanism, or on range hood filters that the DIY process does not reach.
- End of tenancy or property inspection: the standard expected for a bond clean is typically beyond what a DIY clean produces on a heavily used oven.
When a customer calls us after cleaning the oven themselves and it is still smoking, the source is almost always either the range hood filter, which is saturated with grease and recirculating it onto the stovetop and oven exterior with every cooking session, or the area behind the door panels, which accumulates grease over years of use but is rarely touched during a standard home clean. Both are straightforward for a professional to address but difficult to access without the right tools and process.
Optima Cleaners provides professional oven and BBQ cleaning across Australia, with local teams available for oven cleaning in Brisbane, oven cleaning in Sydney, oven cleaning in Melbourne, oven cleaning in Perth, oven cleaning in Adelaide, oven cleaning in Canberra, and oven cleaning on the Gold Coast.
What Professional Oven Cleaning Covers That DIY Does Not
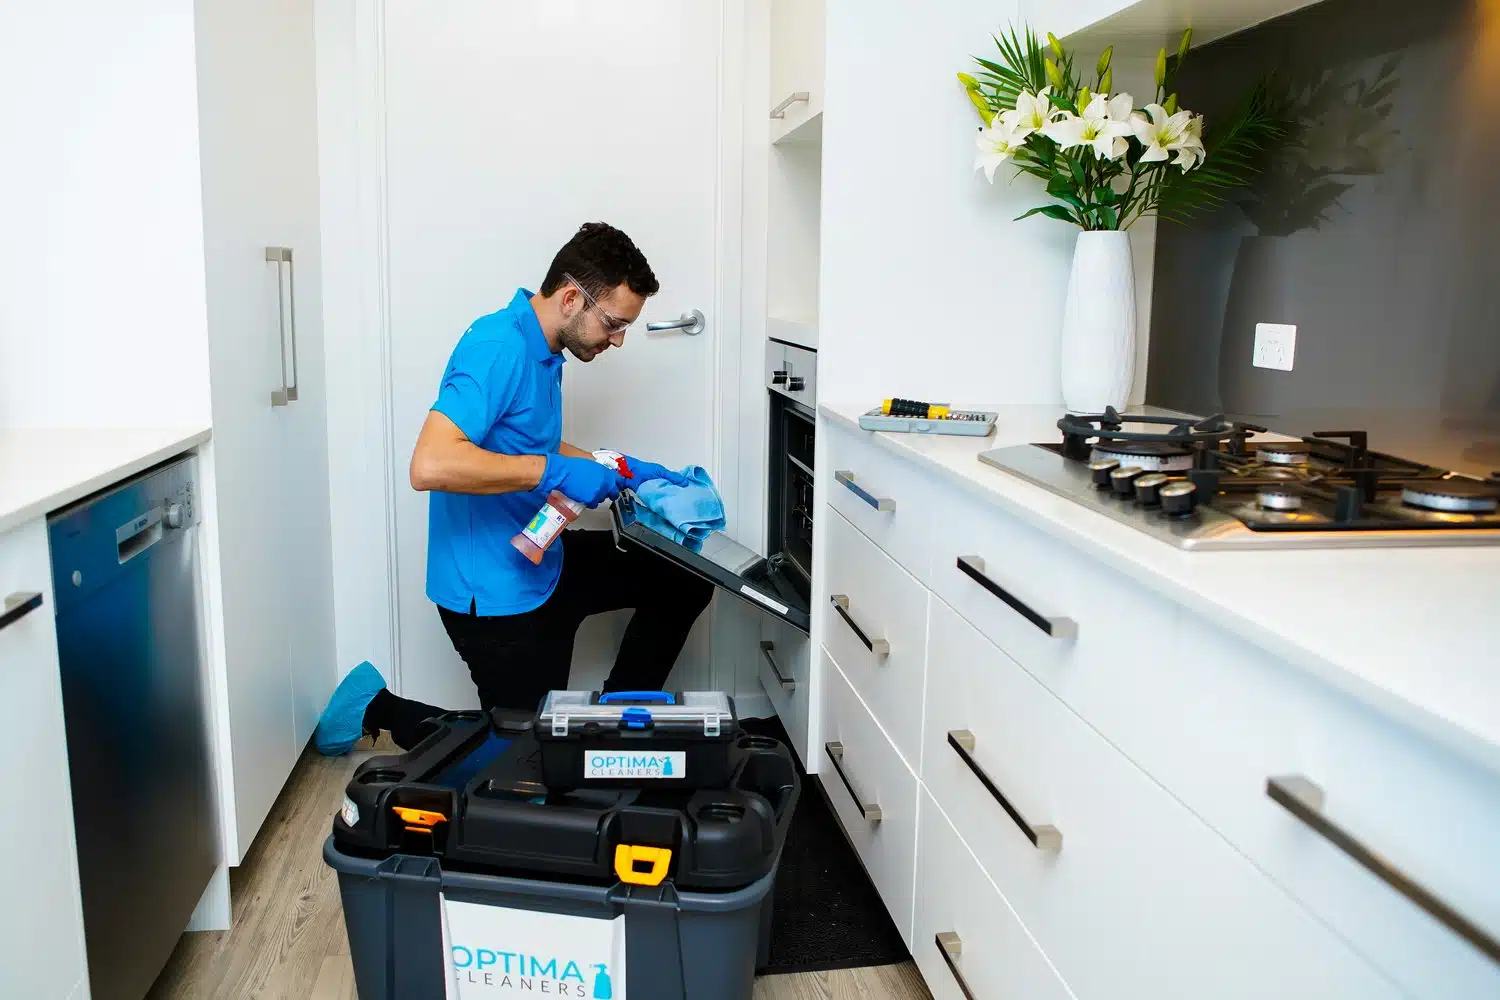
A professional oven clean is not simply a more thorough version of the same process. It covers components and areas that home cleaning does not reach, and uses products that are formulated for higher concentrations of baked-on carbon than household options.
- Partial disassembly of the oven door to clean between the glass panes
- Degreasing of the hinge mechanism and concealed door panel areas
- Range hood filter removal, soaking, and treatment
- Staged removal of carbonised layers using professional degreasers with extended dwell times
- Protective matting around the oven to prevent kitchen floor contamination
- Post-clean testing to confirm the oven operates correctly before the technician leaves
The full process is covered in detail in our
guide to our professional oven cleaning process.
Frequently Asked Questions
Do baking soda and vinegar cancel each other out?
Chemically, yes. The fizzing is the two neutralising each other into water, carbon dioxide and a small amount of salt. That reaction does help loosen residue mechanically, but it is not where most of the cleaning happens. The work is done by the baking soda paste sitting on the grime long enough to soften it, which is why the dwell time matters more than the fizz.
Can I use the self-cleaning or pyrolytic cycle instead?
You can, but it is not always the better option. A pyrolytic cycle heats the oven to around 500 degrees for two to three hours to burn residue down to ash. CHOICE suggests cleaning manually on a regular basis rather than relying on the pyrolytic cycle, because the process runs hot and smoky and needs good ventilation, releasing chemicals including carbon monoxide, so keep children and pets out of the kitchen while it runs. Depending on the model, racks and runners may not be suitable to leave inside either, so check your manual first.
Can I use a commercial oven cleaner spray instead?
Commercial sprays are usually caustic, and they do work on heavy build-up. If you use one, follow the label rather than this guide: ventilate the room, wear gloves, keep it off the heating elements and the fan, and check whether your manufacturer rules it out for coated interiors. The methods above are slower but gentler on the oven and on you.
How long should I set aside for a badly baked-on oven?
Realistically, an overnight soak plus about an hour of work the next morning, and a second pass on the worst areas is common rather than a sign you have done something wrong. If two full attempts have not shifted it, the residue has usually carbonised past the point where home methods will get there.
Combining Oven Cleaning With Other Services
An oven clean is commonly booked alongside other services for a more complete kitchen or property reset.
- home cleaning, for a full household clean before guests, a seasonal reset, or after an extended period between deep cleans
- end of lease cleaning, for properties requiring full appliance and property cleaning before bond return
- carpet and rug cleaning, for flooring near the kitchen that has absorbed cooking odours or grease over time
- upholstery and couch cleaning, for fabric furniture that has taken on cooking smells from an open-plan kitchen
- tile and grout cleaning, for kitchen splashbacks and floor grout that accumulate grease alongside the oven
- spring cleaning, for a comprehensive annual clean that includes the oven, range hood, and full property
Baked-on oven grime is manageable with the right method and enough time. Baking soda paste handles the majority of household grime when left overnight. Hydrogen peroxide and dish soap handle tougher grease deposits. Targeted tools and techniques address corners, racks, glass, and hard-to-reach areas. And consistent maintenance after cleaning keeps the build-up from returning at the same rate.
For grime that has gone beyond what home methods can address, or when you want the job done properly without the time and effort, professional oven and BBQ cleaning is available across Australia. You can also read our DIY oven cleaning hacks guide for additional techniques and method comparisons.
Author Profile

- Radoslav is a managing director at Optima Cleaners, but copywriting has been one of his passions for many years. When he's not hunched over his keyboard, you'll find Radoslav exploring quaint bookstores for inspiration or sipping espresso at his favorite local café, always on the hunt for the next big idea to ignite a brand's success. With a pen in one hand and a coffee cup in the other, Radoslav continues to captivate audiences and breathe life into every brand he touches.
Latest entries
 Oven CleaningOctober 6, 2026Built-In or Balcony BBQ? What to Sort Before a Clean
- Upholstery cleaningSeptember 16, 2026Why Your Freshly Cleaned Sofa Might Look Worse
- Oven CleaningSeptember 5, 2026Is a Dirty Oven Dangerous? What Burnt-On Grease Really Does
- Window cleaningJuly 29, 2025Windows and Mirror Cleaning: Professional Secrets from Optima Cleaners
Previously
Uh Oh! Chewing Gum in the Carpet Removal Guide
May 4, 2021
Next
Simple Ways to Remove Mould from Your Home
April 14, 2021Latest Blog Posts
October 6, 2026 - Oven Cleaning
Built-In or Balcony BBQ? What to Sort Before a Clean
Most BBQ cleaning advice assumes a freestanding hooded BBQ on a concrete patio, a few steps from a garden tap....
Read More

September 16, 2026 - Upholstery cleaning
Why Your Freshly Cleaned Sofa Might Look Worse
Why stains reappear after sofa cleaning, what water damage does inside cushion fill, and why a deep clean can look like nothing happened. Four real jobs.

September 5, 2026 - Oven Cleaning
Is a Dirty Oven Dangerous? What Burnt-On Grease Really Does
Most people live with a dirty oven until something forces their hand. Usually that means after a spill has burned...
Read More
July 29, 2025 - Window cleaning
Windows and Mirror Cleaning: Professional Secrets from Optima Cleaners
You know that feeling when you’ve spent twenty minutes scrubbing your bathroom mirror, only to step back and see more...
Read More
July 8, 2025 - Home Cleaning
Essential Australian Home Defense: Protecting Your Property from Our Harshest Elements
Most homeowners think gutter cleaning is about aesthetics or maybe preventing a bit of overflow during a storm. That thinking...
Read More

June 19, 2025 - DIY cleaning, Home Cleaning
What to Clean Before Guests Arrive (And What You Can Totally Ignore)
The text notification pops up on your phone: “Can’t wait to see you this weekend!” Your heart does a little...
Read More

June 3, 2025 - Carpet Cleaning, Home Cleaning
5 Simple Steps to Keep Your Cowhide Rug Looking Brand New
There’s something undeniably captivating about a beautiful cowhide rug. Whether it’s gracing your living room floor with its natural patterns...
Read More
May 16, 2025 - Mattress Cleaning, Upholstery cleaning
Steam Cleaning vs Dry Cleaning for Upholstery: Which Is Better?
If you’ve got a well-loved sofa or an armchair that’s seen a few too many movie nights, chances are you’re...
Read More
May 6, 2025 - Spring cleaning, Tips and tricks
How to stop insects from taking over your home naturally and effectively
Why Insects Invade Your Home in the First Place If you’ve ever spotted a trail of ants across your kitchen...
Read More

April 15, 2025 - Carpet Cleaning, Tips and tricks
6 Methods to Remove Crayon From Your Carpet
It happens in almost every home with small children at some point – that heart-stopping moment when you discover bright...
Read More