


Keep Your BBQ Grill Clean for Summer
January 13, 2021 - Cleaning, Oven Cleaning
Summer in Australia means the BBQ gets used more than any other appliance. Weeknight dinners, weekend gatherings, long lunches on the deck, the grill that sat idle through winter suddenly becomes the most-used piece of cooking equipment in the house.
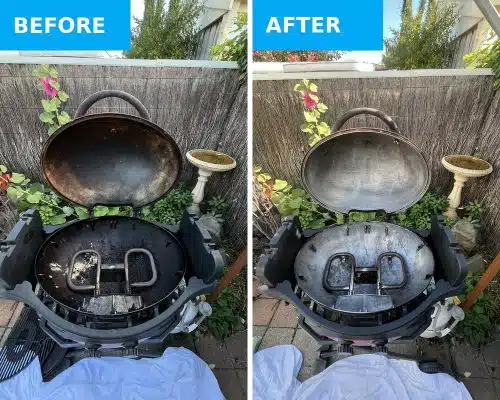
The problem is that grease, fat, carbon, and food residue accumulate quickly under regular use, and a BBQ that is not cleaned between sessions builds up the kind of contamination that affects the taste of food, creates genuine fire risk, and significantly shortens the life of the appliance.
This guide covers how to clean a BBQ grill properly, from grates and grill bodies through to drip trays, burners, and stainless steel exteriors, along with a practical maintenance schedule for keeping it in good condition across the whole summer season.
Why BBQ Cleanliness Matters More Than Most People Realise
A dirty BBQ is more than just unpleasant. The build-up has practical consequences that affect cooking results, appliance longevity, and safety.
- Grease accumulation on grill plates and burners creates flare-ups that scorch food and can become a sustained grease fire if the drip tray is full. The SA Metropolitan Fire Service gives the same advice: regularly clean the plate or grill and do not let fats and oils build up in the drip tray, to prevent flare-ups.
- Old food residue baked onto grates transfers flavour, and not in a good way. Carbonised fat from last week’s sausages affects the taste of this week’s seafood.
- Blocked burner ports on gas grills cause uneven flame distribution, which means uneven cooking temperatures across the grill surface.
- Grease sitting in drip trays for extended periods becomes rancid and can attract insects and rodents, particularly during warm weather.
- Moisture trapped under accumulated grease accelerates corrosion on both cast iron and stainless steel components.
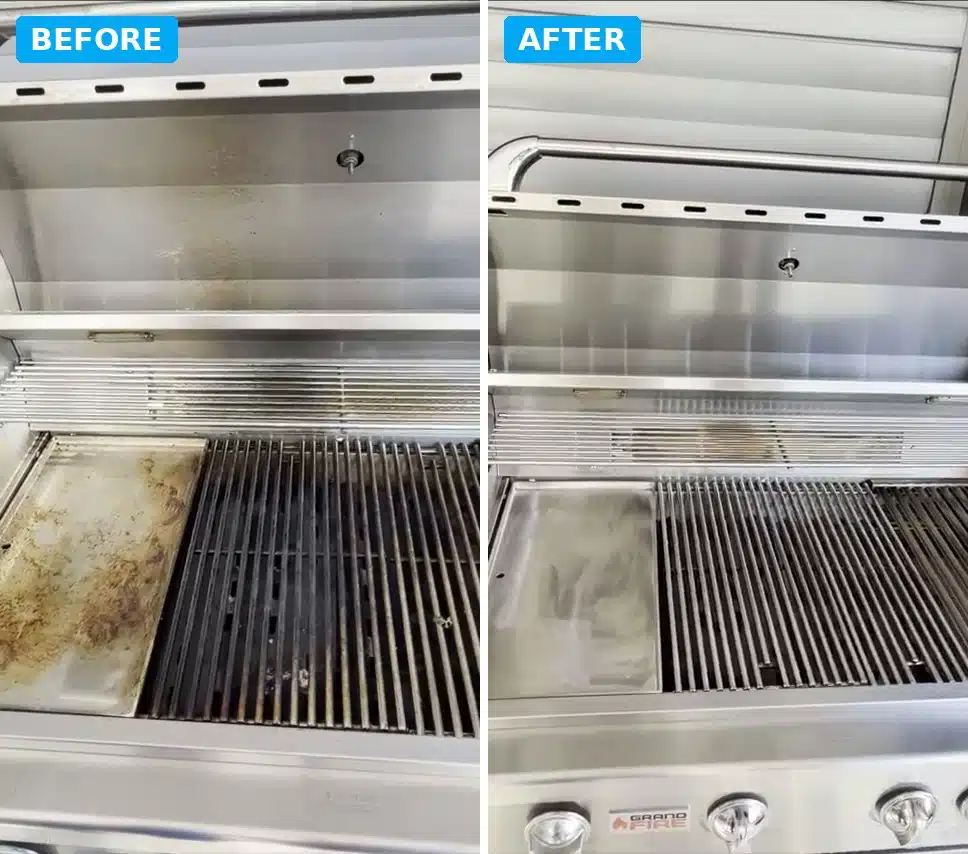
The most common finding on BBQ cleaning jobs is a drip tray that has not been emptied or cleaned for multiple cooking sessions. By the time we arrive, the tray often contains a thick layer of solidified fat and carbon that is significantly harder to remove than fresh grease. Emptying and wiping the drip tray after every two or three uses takes under a minute and prevents one of the most labour-intensive parts of the cleaning job.
What You Need Before You Start
Having the right tools before you begin makes the job faster and protects the appliance surfaces from unnecessary damage.
- Long-handled wire grill brush for cast iron grates
- Stiff-bristle nylon brush for stainless steel grates and surfaces
- Plastic or wooden scraper for the grill interior and drip tray
- Microfibre cloths, at least two or three, kept separate from indoor cloths
- Bucket of warm water with grease-cutting dish soap
- Degreaser spray suitable for BBQ use
- Stainless steel cleaner and a dedicated stainless cloth (for applicable models)
- Heavy rubber gloves
- Old newspaper or a large sheet to protect the outdoor surface beneath
For cast iron grates, avoid soap where possible: it strips the seasoning that builds up over time and provides a natural non-stick surface. Hot water, a stiff brush, and a light re-oiling after drying is the preferred method for cast iron.
Wire brushes are effective but should be inspected before every use. Bristles that have started to separate or fray can detach during cleaning and remain on the grate surface, posing a genuine ingestion risk when the grill is used for cooking. Replace wire brushes regularly, once the bristles show any sign of loosening, the brush should go in the bin. A scraper-style cleaning tool or a folded ball of aluminium foil held with tongs is a safe alternative when you are between brushes.
How to Clean a BBQ: Gas Grill, Step by Step
Gas BBQs are the most common type in Australian backyards. The cleaning process covers grates, burners, the interior hood and cavity, drip tray, and exterior surfaces.
Step 1: Burn Off Residue
Before cleaning, run the BBQ on high heat with the hood closed for 10 to 15 minutes. This burns off loose food residue on the grates and makes it easier to brush away. Do not do this if the drip tray is full: empty it first.
- Turn all burners to high.
- Close the hood and leave for 10 to 15 minutes.
- Turn off the gas and disconnect the gas bottle before any further cleaning.
- Allow the grill to cool until it is warm but not hot: warm surfaces lift residue more easily than cold ones, but you should be able to hold your hand near the grate without discomfort.
Step 2: Clean the Grates
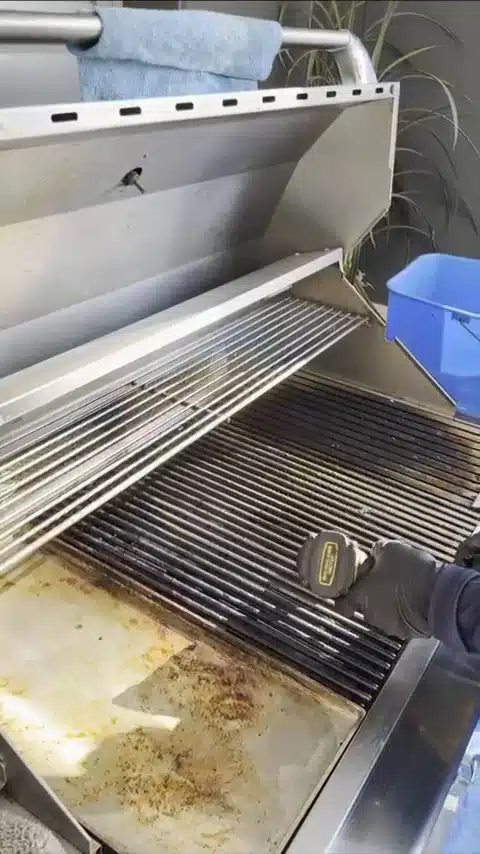
With the grill still warm, brush the grates thoroughly using a long-handled wire brush. Work perpendicular to the grate bars first, then parallel. Apply even downward pressure rather than scrubbing side to side, which is less effective at clearing the grooves.
For a periodic deeper clean, every four to six weeks during summer, remove the grates and soak them in hot soapy water for 30 minutes to an hour, then scrub with a stiff brush and rinse thoroughly. Dry completely before reinstalling.
Cast iron grates that have been left to rust after extended outdoor storage are a common issue at the start of summer. Light surface rust can be removed with a wire brush and then the grate re-seasoned with a thin coat of cooking oil, heated on the grill for 15 minutes. Deep pitting rust means the grate should be replaced. Cooking on a heavily rusted cast iron surface is not safe and the rust cannot be effectively removed by cleaning alone.
Step 3: Clean the Burners and Flame Tamers
Blocked burner ports cause uneven flame and are one of the most common reasons a gas BBQ cooks unevenly. With the gas disconnected, inspect the burner tubes for blockages.
- Remove the flame tamers (the angled metal shields above the burners) and soak in warm soapy water for 20 minutes.
- Scrub the flame tamers with a stiff brush to remove baked-on grease and carbon.
- Inspect the burner tubes for blocked ports: a small stiff brush or skewer can clear individual ports.
- Brush burner tubes from side to side (not end to end, which can push debris into the gas valve).
- Rinse and dry all components before reassembly.
Burner tubes should be checked at the start of each summer season and mid-season for frequent users. Spider webs inside the burner tubes, particularly in grills that sat unused over winter, are a significant gas safety risk. Spiders build nests inside the tubes during periods of non-use, and the blockage can cause gas to back up toward the control valves. If you notice any irregularity in the flame pattern when you first use the grill after a long break, turn it off and check the burner tubes before continuing.
Step 4: Clean the Interior Hood and Cavity
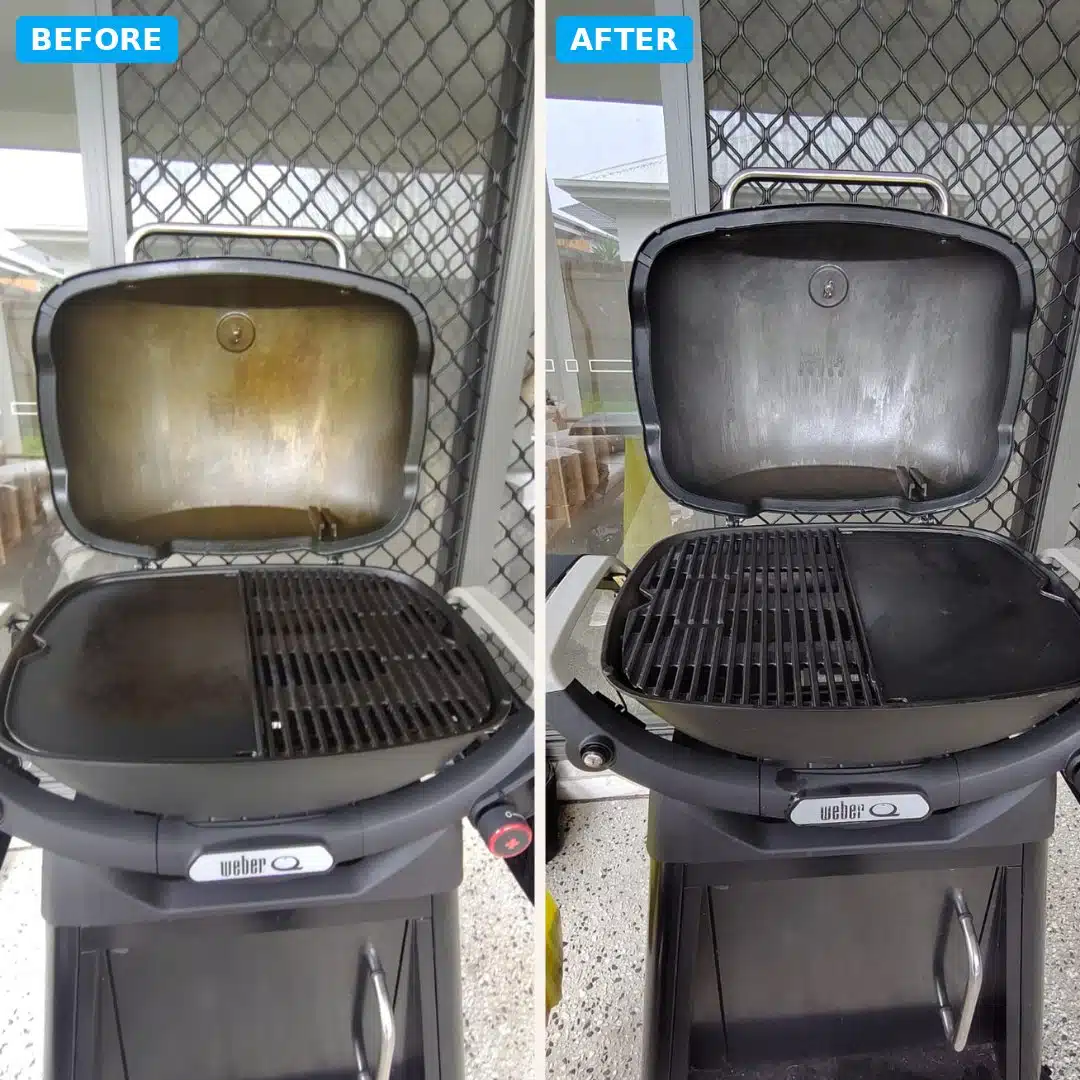
Grease vapour rises during cooking and condenses on the inside of the hood, eventually dripping back onto food if not cleaned regularly. A thick grey or brown coating on the hood interior is grease mixed with smoke residue.
- Wipe the hood interior with a damp cloth to remove loose deposits.
- Apply a degreaser spray and leave for five to ten minutes.
- Wipe clean with a fresh damp cloth, working from front to back.
- Rinse with a clean damp cloth to remove all degreaser residue before cooking.
Do not use abrasive pads on the hood interior if it has a porcelain enamel coating: this scratches the surface and makes it harder to clean in future.
Step 5: Empty and Clean the Drip Tray
The drip tray sits beneath the grill and catches rendered fat during cooking. It is the highest fire-risk component on the BBQ if neglected.
- Remove the drip tray carefully: it may contain liquid grease.
- Empty into a sealed container for disposal (not down a drain or onto garden soil).
- Scrape solidified grease from the tray with a plastic scraper.
- Wash in hot soapy water and dry before reinserting.
Lining the drip tray with a sheet of aluminium foil makes future clean-outs significantly faster: fold the foil around the edges to prevent it moving during cooking, and replace it after every two or three sessions.
Cleaning a Charcoal BBQ Grill
Charcoal grills require a different approach because ash and carbon debris need to be fully removed between sessions, and the interior cannot simply be wiped while warm.
- Wait until all coals are completely extinguished and the grill is cold: this can take several hours after use.
- Remove the grates and set aside.
- Dispose of all old ash and spent briquettes. Do not leave ash in the firebox between sessions: ash absorbs moisture and accelerates corrosion of the bowl.
- Vacuum or brush out remaining ash from the firebox and vent openings.
- Scrape any grease or carbon build-up from the interior walls with a plastic scraper or putty knife.
- Rinse the firebox interior with warm water and dry thoroughly.
- Soak the grates in warm soapy water and scrub with a stiff brush.
- Dry all components completely before reassembly.
The bottom air vents on charcoal grills are often clogged with ash residue, which restricts airflow and affects how well the coals light and maintain temperature. Checking and clearing the vents as part of the post-cook clean takes 30 seconds and noticeably improves the grill’s cooking performance. A small stiff brush or pipe cleaner works well for this.
Cleaning Stainless Steel BBQ Surfaces
Stainless steel exteriors and cooking surfaces require a different approach from cast iron grates. Stainless scratches easily, and the wrong cleaning method can permanently dull or streak the finish.
What to Use
- Soft microfibre cloths only, never steel wool, abrasive pads, or wire brushes on stainless surfaces
- A gentle dish soap or a cleaner specifically formulated for stainless steel
- A stainless steel polish made for high-heat applications: check the label to confirm it is suitable for BBQ use
This matches the advice from CHOICE, which recommends a stainless steel cleaner for stainless BBQ exteriors.
How to Clean
- Allow the grill to cool completely before cleaning stainless surfaces.
- Apply the cleaner with a microfibre cloth and work in small circular sections.
- Remove food particles by rinsing the cloth frequently: dragging particles across the surface causes fine scratches.
- Wipe dry with a separate clean microfibre cloth.
- If polishing, apply a high-heat stainless steel polish and buff in the direction of the grain, not in circles.
Acidic marinades and sauces splattered onto stainless steel during cooking should be wiped off after the grill cools. Left to sit, acids accelerate surface corrosion that appears as small pitting or discolouration.
One of the most consistent things we notice on stainless steel BBQs is streaking caused by wiping against the grain. Stainless steel has a visible directional grain, a faint pattern of lines running across the surface. Always wipe parallel to this grain, never perpendicular or in circles. Also be careful with polishes: a product designed for kitchen appliances or refrigerators is not rated for high heat and will emit fumes and potentially corrode the surface once the BBQ heats up. Only use polish products explicitly rated for outdoor grill use.
For detailed guidance specifically on stainless steel BBQ care, see our guide to cleaning a stainless steel BBQ.
BBQ Cleaning Challenges Worth Knowing About
Real-world BBQ cleaning jobs come with practical complications that are useful to know before you start, or before booking a professional service.
No Water Access Near the BBQ
Balconies, rooftop entertaining areas, and some outdoor spaces do not have a tap close to the BBQ. This limits the conventional water-based cleaning method. If water access is restricted, a non-water-based degreaser applied with cloths can still produce a good result, though it is worth understanding that the process differs from a full water clean. If booking a professional service, mention the water access situation upfront so the right products can be prepared.
BBQ on a Balcony or Elevated Area
Moving a BBQ from a balcony to a lower area for cleaning is manageable for smaller units, generally up to a three-burner size. For larger or heavier BBQs, cleaning in place is the safer option. Remove the grill plates, burner covers, and drip tray and carry those to a suitable cleaning area, then clean the body in place. This avoids the risk of damaging the appliance, flooring, or door frames during an awkward lift.
A BBQ That Has Not Been Used for Several Months
A BBQ left unused over winter often has specific issues beyond standard grease build-up: spider webs in the burner tubes (a gas safety issue), surface rust on cast iron grates, dried and oxidised grease in the drip tray, and possible moisture damage inside the hood. Work through these systematically before the first summer cook rather than assuming a quick brush-down is sufficient.
We recommend a dedicated start-of-season clean for any BBQ that has been stored or covered over winter, even if it was clean when it was last used. Grills that look clean externally can have significant issues internally, particularly in the burner tubes and behind the flame tamers, that only become apparent once the grill is lit. A preventive check and clean before the first summer use is worth the time.
A Practical BBQ Cleaning Schedule for Summer
The frequency of cleaning depends on how often the BBQ is used, but a consistent schedule prevents the kind of accumulated build-up that makes cleaning difficult.
After Every Use
- Run the grill on high for 10 minutes with the hood closed to burn off food residue.
- Brush grates while still warm.
- Wipe exterior surfaces once cooled.
- Check the drip tray: empty if more than a third full.
Every Four to Six Uses
- Remove and soak grates in hot soapy water.
- Empty and scrub the drip tray thoroughly.
- Wipe down the hood interior with degreaser.
- Check flame tamers for build-up and clean if needed.
Start and End of Season
- Full disassembly and cleaning of all removable components.
- Inspect burner tubes for blockages and spider webs.
- Check gas connections and hose for wear (gas models).
- Check grates for rust and replace if needed.
- Polish stainless steel surfaces with a high-heat rated polish.
- Cover with a fitted weatherproof cover when storing.
When to Call a Professional BBQ Cleaner
DIY cleaning handles most BBQ maintenance well. A professional clean is worth considering when:
- The grill has heavy carbon deposits under the hood or on the grate supports that a brush cannot remove.
- The drip tray has solidified fat that has hardened and bonded to the tray surface.
- The burner tubes are partially blocked and the flame pattern is visibly uneven.
- The BBQ has not been cleaned in over a season and the build-up is substantial.
- You are preparing the property for a short-term rental or holiday letting where the BBQ will be used by guests.
- You do not have the time or access to do the job properly before a gathering.
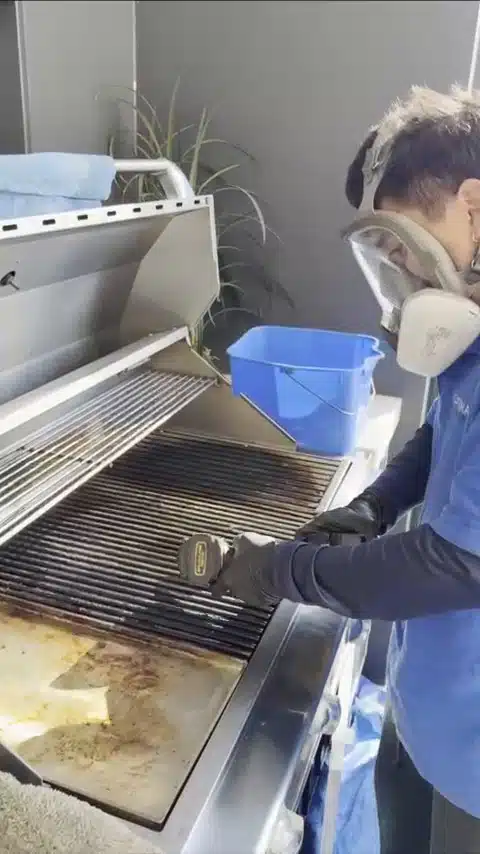
Optima Cleaners provides professional BBQ and oven cleaning across Australia, with local teams for BBQ cleaning in Brisbane, BBQ cleaning in Sydney, BBQ cleaning in Melbourne, BBQ cleaning in Perth, BBQ cleaning in Adelaide, BBQ cleaning in Canberra, and BBQ cleaning on the Gold Coast.
Pairing BBQ Cleaning With Other Summer Prep
The start of the summer entertaining season is a natural time to address other outdoor and indoor cleaning tasks alongside the BBQ. Services that pair well include:
- home cleaning, for a full indoor reset before hosting guests across the summer
- spring cleaning, for a comprehensive pre-summer clean covering the full property
For oven-specific cleaning guides, see our articles on how to remove baked-on oven grime and maintaining your oven door seal.
A clean BBQ performs better, lasts longer, and is genuinely safer to use. The grates, drip tray, burners, and hood each need slightly different attention, but the process is manageable with the right tools and a consistent routine. A few minutes of cleaning after each use prevents the build-up that turns a straightforward maintenance job into a major project.
If the grill needs more than a DIY clean can deliver before summer entertaining starts, professional BBQ and oven cleaning is available across Australia to restore it properly.
Author Profile

- Radoslav is a managing director at Optima Cleaners, but copywriting has been one of his passions for many years. When he's not hunched over his keyboard, you'll find Radoslav exploring quaint bookstores for inspiration or sipping espresso at his favorite local café, always on the hunt for the next big idea to ignite a brand's success. With a pen in one hand and a coffee cup in the other, Radoslav continues to captivate audiences and breathe life into every brand he touches.
Latest entries
 Oven CleaningOctober 6, 2026Built-In or Balcony BBQ? What to Sort Before a Clean
- Upholstery cleaningSeptember 16, 2026Why Your Freshly Cleaned Sofa Might Look Worse
- Oven CleaningSeptember 5, 2026Is a Dirty Oven Dangerous? What Burnt-On Grease Really Does
- Window cleaningJuly 29, 2025Windows and Mirror Cleaning: Professional Secrets from Optima Cleaners

Previously
Qualities of a Great Commercial Cleaner
February 18, 2021
Next
How to Clean a White Leather Couch
December 4, 2020Latest Blog Posts
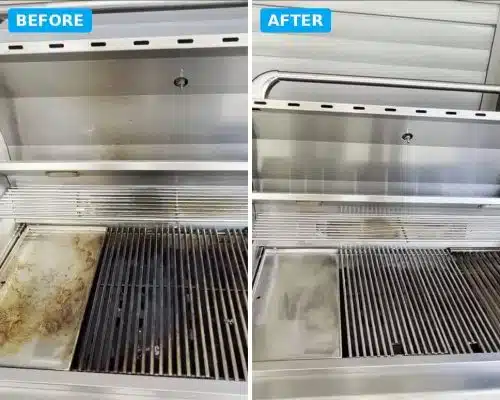
October 6, 2026 - Oven Cleaning
Built-In or Balcony BBQ? What to Sort Before a Clean
Most BBQ cleaning advice assumes a freestanding hooded BBQ on a concrete patio, a few steps from a garden tap....
Read More

September 16, 2026 - Upholstery cleaning
Why Your Freshly Cleaned Sofa Might Look Worse
Why stains reappear after sofa cleaning, what water damage does inside cushion fill, and why a deep clean can look like nothing happened. Four real jobs.

September 5, 2026 - Oven Cleaning
Is a Dirty Oven Dangerous? What Burnt-On Grease Really Does
Most people live with a dirty oven until something forces their hand. Usually that means after a spill has burned...
Read More
July 29, 2025 - Window cleaning
Windows and Mirror Cleaning: Professional Secrets from Optima Cleaners
You know that feeling when you’ve spent twenty minutes scrubbing your bathroom mirror, only to step back and see more...
Read More
July 8, 2025 - Home Cleaning
Essential Australian Home Defense: Protecting Your Property from Our Harshest Elements
Most homeowners think gutter cleaning is about aesthetics or maybe preventing a bit of overflow during a storm. That thinking...
Read More

June 19, 2025 - DIY cleaning, Home Cleaning
What to Clean Before Guests Arrive (And What You Can Totally Ignore)
The text notification pops up on your phone: “Can’t wait to see you this weekend!” Your heart does a little...
Read More

June 3, 2025 - Carpet Cleaning, Home Cleaning
5 Simple Steps to Keep Your Cowhide Rug Looking Brand New
There’s something undeniably captivating about a beautiful cowhide rug. Whether it’s gracing your living room floor with its natural patterns...
Read More
May 16, 2025 - Mattress Cleaning, Upholstery cleaning
Steam Cleaning vs Dry Cleaning for Upholstery: Which Is Better?
If you’ve got a well-loved sofa or an armchair that’s seen a few too many movie nights, chances are you’re...
Read More

May 6, 2025 - Spring cleaning, Tips and tricks
How to stop insects from taking over your home naturally and effectively
Why Insects Invade Your Home in the First Place If you’ve ever spotted a trail of ants across your kitchen...
Read More

April 15, 2025 - Carpet Cleaning, Tips and tricks
6 Methods to Remove Crayon From Your Carpet
It happens in almost every home with small children at some point – that heart-stopping moment when you discover bright...
Read More