


The Ultimate Guide to Our Professional Oven Cleaning Process
December 17, 2024 - Business, Home Cleaning, Oven Cleaning
The Ultimate Guide to Our Professional Oven Cleaning Process
A heavily soiled oven is not just unpleasant to look at. Burnt-on grease, food residue, smoke, and lingering odours can affect how your oven performs and how your food tastes.
DIY cleaning can help with light mess, but it often struggles with years of carbon build-up, greasy glass panels, range hood filters, cooktops, and awkward corners that are hard to reach safely.
That is where professional oven cleaning makes a difference. At Optima Cleaners, our process is designed to clean the oven, racks, trays, range hood, and cooktop thoroughly — without harsh shortcuts, chemical residue left behind, or unnecessary mess in your kitchen.
This guide walks through exactly what happens during a professional oven clean, why each step matters, and what to expect from start to finish.
What Happens During a Professional Oven Clean?
A professional oven clean includes inspection, preparation, careful disassembly, degreasing, detailed scrubbing, rinsing, drying, reassembly, polishing, testing, and a final customer check.
Quick answer:
- The oven is inspected first.
- The work area is protected.
- Removable parts are taken out.
- Racks, trays, and panels are deep cleaned.
- Grease and carbon are treated safely.
- The oven is reassembled and checked.
- Final photos and inspection confirm the result.
For homeowners who want this done without the scrubbing, Optima offers oven cleaning services in Brisbane, oven cleaning services in Sydney, oven cleaning services in Melbourne, and oven cleaning services in Perth.
Why Choose Professional Oven Cleaning Instead of DIY?
Professional oven cleaning is worth considering when DIY methods no longer remove smoke, odour, heavy grease, burnt-on food, or hidden grime around doors, racks, seals, and range hood filters.
Professional cleaning helps with:
- Heavy grease build-up
- Burnt carbon deposits
- Smoky ovens
- Lingering cooking smells
- Dirty racks and trays
- Greasy range hoods
- Hard-to-reach glass and seals
DIY kits can be messy and time-consuming, and the wrong product on the wrong surface can scratch coatings or damage seals. A professional clean is about more than shine — it helps restore hygiene, appearance, and day-to-day appliance performance.
The most common reason customers call us after attempting a DIY clean is that the oven still smokes or smells after they have done everything the product label suggested. In most of these cases, the issue is not the product — it is carbon build-up in areas that are genuinely difficult to reach without disassembling the door or removing certain panels. A surface clean, however thorough, will not touch residue sitting between the door glass panes or packed into the hinge fold
Signs Your Oven Needs a Professional Clean
You may not need professional help for every small spill, but certain signs usually mean the oven needs a deeper clean than a quick wipe-down.
Signs include:
- Smoke appears when the oven heats.
- Food smells burnt before cooking starts.
- Grease is baked onto the door glass.
- Racks feel sticky or look dark.
- The range hood filter is greasy.
- Carbon build-up will not lift.
- DIY cleaning has stopped working.
If these signs keep coming back, a professional oven cleaner in Sydney, professional oven cleaner in Brisbane, professional oven cleaner in Melbourne, or professional oven cleaner in Perth can handle the deeper build-up safely.
Step 1: Inspection and Preparation
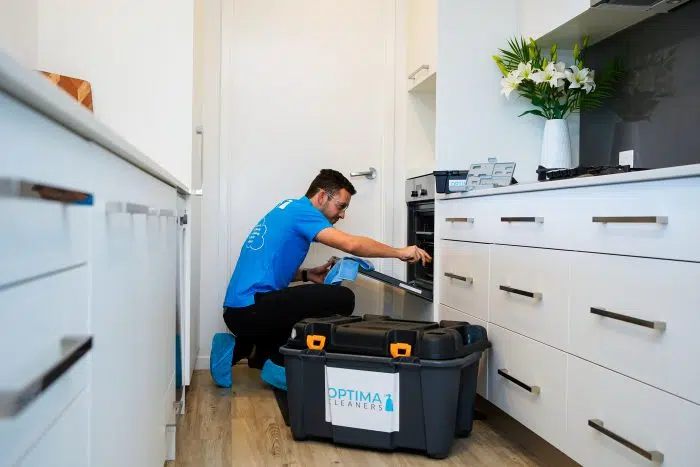
The first step is inspection. Before cleaning begins, the technician checks the oven, range hood, cooktop, racks, trays, seals, and glass panels.
During inspection, we look for:
- Heavy grease deposits
- Burnt carbon patches
- Loose or worn seals
- Grease behind panels
- Range hood filter build-up
- Areas needing extra care
Pre-cleaning photos are taken to document the starting condition and highlight problem areas. The work area is then protected with mats or floor coverings so the surrounding kitchen stays clean throughout the service.
Why Does Preparation Matter?
Oven cleaning involves greasy parts, wet cloths, degreasers, and removable components. Without proper protection, cleaning products and loosened grease can drip onto kitchen flooring, benchtops, and cabinetry. Protecting the kitchen first keeps the process controlled.
We lay down protective matting around the oven base on every job before anything else is touched. Even with careful application, degreasers drip and grease residue transfers during removal of racks and trays. Two minutes of preparation prevents a secondary clean of the floor and surrounding cabinetry every single time. This is one of those steps that separates a professional job from a rushed one.
What Do We Check During Inspection?
Beyond obvious grease and carbon, the inspection covers the door seal condition, whether the inner glass panel is removable, the state of the oven light, and any signs of electrical damage or unusual wear. If we identify something that affects what we can safely clean — such as a damaged seal or a non-removable bonded glass panel — we discuss it with you before we start.
Occasionally we inspect an oven and find that the light bulb has failed, which makes working inside the cavity much harder. Our technicians carry a head torch for exactly this situation. We also offer bulb replacement as an add-on — if you know the bulb is out before we arrive, letting us know allows us to come prepared with the correct globe.
Step 2: Disassembly and Deep Cleaning
For a deeper clean, removable oven parts are taken out and cleaned separately. This gives the technician access to areas that are almost impossible to reach properly with the oven fully assembled.
Parts may include:
- Oven racks
- Trays
- Grill inserts
- Side racks
- Door glass panels (where removable)
- Seals where safely detachable
- Range hood filters
Each part is treated according to its material and condition. Greasy racks, glass panels, and filters often require a different approach to the main oven cavity. Chrome racks with worn plating, for example, are handled more carefully to avoid accelerating surface deterioration during soaking.
What Gets Cleaned in the Oven Cavity?
The oven cavity is cleaned to remove softened grease, loose residue, and carbon build-up. Corners, edges, and door frames are treated carefully so grime is removed without damaging seals, elements, or coatings.
Focus areas include:
- Oven floor
- Side walls
- Door frame
- Door glass (inner and outer surfaces)
- Corners and edges
- Grill area
The door hinge mechanism is one of the greasiest areas on any oven and one of the most consistently overlooked. Grease runs down the inner door panel during cooking and collects in the hinge fold over time. We work through this area with a brush and targeted degreaser on every job — it is not glamorous, but it is one of the reasons the oven looks and smells clean after we leave, rather than just appearing clean on the visible surfaces.
What Happens With the Oven Glass?
On most ovens, the inner glass panel can be detached from the door for cleaning on both surfaces. This is the only way to properly clean grease that has worked its way between the panes during cooking.
On some models, the glass is bonded or sealed and cannot be removed without risking damage to the door frame. In these cases, we discuss the options with you before proceeding. If cleaning only the accessible glass surfaces is not the outcome you were expecting, we would rather pause than carry out a partial clean without your knowledg
Step 3: Eco-Friendly Degreasing
Professional oven cleaning does not need to leave harsh chemical smells behind. Optima Cleaners uses professional-grade, non-caustic degreasing products designed to break down grease effectively while being safe for use around food-preparation areas.
The goal is to remove:
- Sticky grease
- Burnt food residue
- Carbon patches
- Old splatter
- Range hood film
The cleaner needs adequate dwell time to work. Applying a degreaser and wiping immediately is one of the most common mistakes in oven cleaning — professional or otherwise. Once the grease has been properly softened, the technician can scrub, wipe, rinse, and detail the appliance far more effectively than force alone would allow.
For ovens with multiple years of baked-on carbon, we apply the degreaser in stages rather than all at once. The outer layer of carbon softens first and is removed before the next application goes onto the layer beneath. Trying to remove several years of build-up in a single application puts more physical pressure on the oven surface than the coating is designed for. Staged removal takes longer but protects the enamel and produces a cleaner result.
Step 4: Range Hood and Cooktop Cleaning
A proper kitchen appliance clean should not stop at the oven cavity. Range hoods and cooktops collect grease every time you cook, especially above stovetops used daily for frying, searing, or simmering.
Range hood build-up signs include:
- Greasy filters
- Sticky controls
- Reduced extraction airflow
- Oil marks on the hood exterior
- Lingering cooking smells after meals
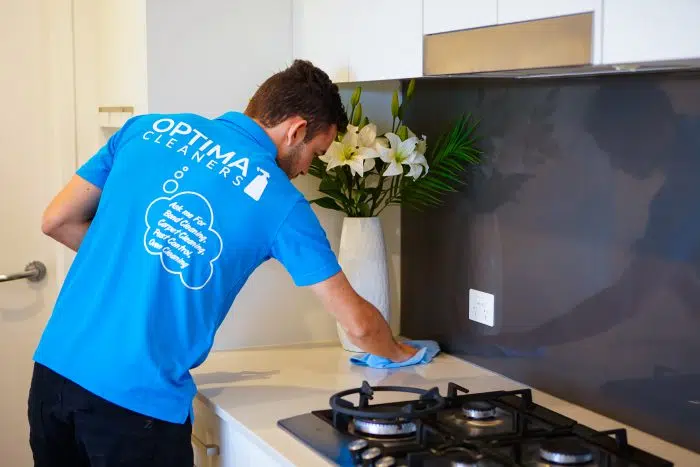
Filters, controls, visible surfaces, and greasy edges are cleaned so the appliance looks better and operates more effectively. A blocked or heavily greased filter reduces extraction efficiency noticeably, and in a busy kitchen this contributes to the build-up of cooking odours throughout the room.
Range hood filters are one of the most neglected components in a residential kitchen. On jobs where the oven is heavily soiled, the range hood filter is almost always in poor condition too. A saturated filter cannot extract steam and grease vapour efficiently, which means more grease is settling back onto the stovetop, benchtop, and splashback with every meal cooked. Cleaning the filter regularly — even just rinsing it with hot soapy water every month or two — makes a meaningful difference to the overall cleanliness of the kitchen.
What About BBQ Cleaning?
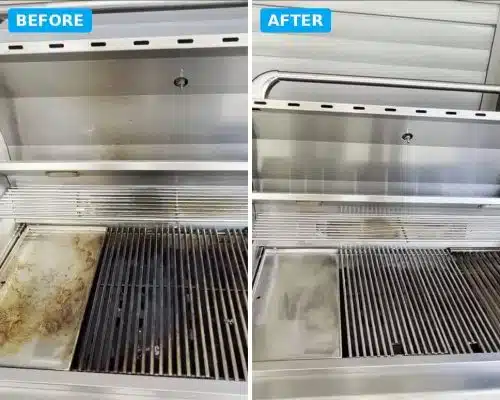
The same type of grease and carbon build-up that affects ovens can accumulate in outdoor BBQs. Grill plates, burners, knobs, hoods, and drip trays all collect residue that is difficult to remove with a quick scrape.
BBQ cleaning may be needed when:
- The BBQ smokes before food is added.
- Grease sits under the hood.
- Grill plates feel sticky.
- Old food smells linger.
- Drip trays are heavily built up.
Optima also provides BBQ cleaning in Brisbane, BBQ cleaning in Sydney, BBQ cleaning in Melbourne, and BBQ cleaning in Perth through its oven and BBQ cleaning service.
BBQ Challenges We Have Encountered on Jobs
Real BBQ cleaning jobs come with practical complications that are worth knowing about before a technician arrives.
No water access on site — particularly common on balconies, rooftop terraces, or properties where the outdoor tap is not near the BBQ. If we know this in advance, we can prepare non-water-based cleaning solutions. The process and results will differ from the conventional method, but the job can still be completed to a good standard with the right preparation.
Moving a BBQ from a balcony to a ground-level area — manageable for units up to a three-burner size. For larger BBQs, we recommend cleaning in place on the balcony, removing and transporting the grill plates, burner covers, and drip trays to a dedicated cleaning area, and reassembling on site. This avoids the risk of damage to the BBQ, flooring, or door frames from an awkward or heavy lift.
No power on site — relevant for certain cleaning methods and appliance testing. A portable generator is available as an add-on for properties between tenancies, mid-renovation, or with a power fault. As with water access, advance notice allows us to prepare and ensures the service runs smoothly
Step 5: Rinsing, Drying, and Reassembly
Once the grease and residue have been removed, the cleaned parts are rinsed, dried, and reassembled. This step matters because racks, trays, seals, and glass panels need to be returned to their correct position and orientation.
Reassembly checks include:
- Racks slide correctly and sit level.
- Glass panels sit securely in the door frame.
- Seals are inspected and seated properly.
- Trays are fully dry before reinsertion.
- Controls and exterior surfaces are wiped down.
Wet racks returned to the oven before they are properly dry can cause rust spots to develop at the joints and worn plating areas, particularly on older racks where the chrome coating has started to thin. We dry all removable parts thoroughly before reassembly. If you are doing a DIY rack soak at home, allow them to air dry fully — ideally for several hours — before putting them back.
Step 6: Polishing and Final Appliance Check
The finishing stage focuses on details. Exterior surfaces, knobs, handles, and stainless steel areas are polished so the oven looks clean from the inside out — not just the cavity.
Final checks include:
- Knobs and handles are wiped and dried.
- Exterior surfaces are polished.
- Range hood surfaces are checked.
- Any loose residue is removed.
- The appliance is tested where appropriate.
This step confirms the oven has been cleaned thoroughly and that no detail has been missed before the job is signed off. Testing the oven briefly after reassembly also gives the technician a chance to check that nothing has been disturbed during the cleaning process.
Step 7: Customer Inspection and Completion
Before the technician leaves, you can inspect the result. This is your opportunity to ask questions, check the finish across all areas, and confirm that the work meets your expectations.
Completion may include:
- Final customer walkthrough and inspection
- After-clean photos for your records
- Payment finalisation
- Maintenance tips if needed
- Contact details for future bookings
The goal is to make the process clear and stress-free from the first inspection to the final wipe-down. If something is not to your satisfaction during the walkthrough, we would rather know on the day than after the technician has left.
Safety Considerations on Every Job
Oven cleaning involves heat, electrical components, gas connections in some cases, and professional-grade degreasers. Safety is built into every step of the process.
Before Cleaning Starts
All appliances are turned off at the wall, isolated from power, and confirmed cool before any cleaner is applied or any part is removed. For gas ovens, the gas supply is shut off and connections are checked before work begins. If an appliance shows signs of electrical damage — burn marks, unusual smells during operation, or visible wear around the element — we report this immediately and do not proceed until the issue has been assessed.
Chemical Handling
Our technicians work with gloves and eye protection throughout the job. In enclosed kitchen spaces, windows are opened and the exhaust fan is run during chemical application. All degreasing residue is neutralised and wiped thoroughly before the oven is reassembled, ensuring the interior is food-safe before use.
Surface and Appliance Protection
Protective matting is placed around the oven and on surrounding flooring before the job starts. We avoid abrasive pads or metal scrapers on enamel and glass surfaces. For heavy carbon removal, dwell time and specialist tools are used in place of force — this protects the appliance coating and produces better results than scrubbing alone.
Post-Clean Testing
After reassembly, the oven is run briefly to check for any lingering odour, verify that the door closes and seals correctly, and confirm that all components have been returned to their proper position. The area is left clean and the oven is ready for use before the technician departs.
How Often Should You Book Professional Oven Cleaning?
Most households benefit from professional oven cleaning once or twice a year, depending on how often the oven is used. Busy kitchens, rental properties, shared homes, and frequent entertainers may need it more regularly.
Book sooner if:
- The oven smokes during cooking.
- Grease is visible on the glass.
- Food smells burnt before cooking starts.
- The range hood is sticky or slow to extract.
- You are moving house.
- Guests are coming and the oven has not been cleaned in months.
- DIY cleaning is no longer keeping up with the build-up.
End-of-tenancy bookings are among the most time-intensive oven cleans we do, particularly in properties where the oven has not been cleaned throughout the tenancy. An oven that receives a light clean every few months takes a fraction of the time and cost to professionally service compared to one that is left for a year or more. The difference in condition — and the difference in what is achievable in a single visit — is significant
What Other Cleaning Services Pair Well With Oven Cleaning?
Oven cleaning is often booked as part of a wider kitchen or home reset. If grease, dust, carpet odours, or upholstery stains are also an issue, combining services can make the whole home feel fresher in a single visit.
Helpful add-on services include:
- home cleaning services in Sydney for a full household reset alongside the kitchen
- home cleaning in Melbourne before hosting, moving, or a seasonal clean
- home cleaning in Brisbane for routine or deep cleaning across the whole property
- home cleaning in Perth when the kitchen is only one part of a larger job
- carpet cleaning in Sydney or carpet cleaning in Brisbane for food spills and cooking odours absorbed into flooring
- upholstery cleaning in Melbourne, couch cleaning in Sydney, or sofa cleaning in Brisbane for fabric furniture that has absorbed cooking smells over time
Why Choose Optima Cleaners for Oven Cleaning?
Optima Cleaners focuses on a detailed, practical process rather than a quick surface wipe. The service is designed to remove visible grime, treat hidden grease, protect surrounding areas, and leave the appliance ready for everyday use.
Reasons customers choose Optima:
- Thorough inspection before any cleaning begins
- Careful disassembly of removable parts where appropriate
- Attention to racks, trays, glass panels, and range hoods
- Professional-grade, non-caustic cleaning products
- Floor and kitchen protection set up before the job starts
- Transparent communication about what can and cannot be achieved
- Final customer walkthrough before the technician leaves
Whether you need oven cleaning services in Sydney, oven cleaning services in Brisbane, oven cleaning services in Melbourne, or oven cleaning services in Perth, the aim is the same: a cleaner, fresher oven without spending your afternoon scrubbing.
Ready for a Cleaner Kitchen?
Life is too short to spend hours fighting burnt-on grease. A professional oven clean can help restore your appliance, freshen your kitchen, and make cooking feel cleaner again.
If your oven smokes, smells, or has grime that will not shift, Optima Cleaners can handle the hard work with a professional oven and BBQ cleaning process designed for real household build-up — not just the surface layer.
Author Profile

- Dylan Cransworth is a dynamic and passionate copywriter with a flair for turning words into compelling narratives. Armed with a keen understanding of consumer behavior and marketing trends, Dylan crafts persuasive and engaging copy that captivates target audiences. With a background in creative writing and a penchant for storytelling, Dylan brings brands to life through persuasive language and strategic messaging.
Latest entries
 DIY cleaningFebruary 4, 2025How to Divide Household Chores Fairly (Without the Arguments!)
- Carpet CleaningJanuary 10, 2025Can You Clean a Mattress with a Carpet Cleaner?
- BusinessDecember 17, 2024The Ultimate Guide to Our Professional Oven Cleaning Process
- Carpet CleaningDecember 7, 2024How To Clean Carpet By Hand: A Step by Step Guide


Previously
Must-Have Cleaning Essentials for a Spotless Home
January 3, 2025
Next
How To Clean Carpet By Hand: A Step by Step Guide
December 7, 2024Latest Blog Posts
October 6, 2026 - Oven Cleaning
Built-In or Balcony BBQ? What to Sort Before a Clean
Most BBQ cleaning advice assumes a freestanding hooded BBQ on a concrete patio, a few steps from a garden tap....
Read More

September 16, 2026 - Upholstery cleaning
Why Your Freshly Cleaned Sofa Might Look Worse
Why stains reappear after sofa cleaning, what water damage does inside cushion fill, and why a deep clean can look like nothing happened. Four real jobs.

September 5, 2026 - Oven Cleaning
Is a Dirty Oven Dangerous? What Burnt-On Grease Really Does
Most people live with a dirty oven until something forces their hand. Usually that means after a spill has burned...
Read More
July 29, 2025 - Window cleaning
Windows and Mirror Cleaning: Professional Secrets from Optima Cleaners
You know that feeling when you’ve spent twenty minutes scrubbing your bathroom mirror, only to step back and see more...
Read More
July 8, 2025 - Home Cleaning
Essential Australian Home Defense: Protecting Your Property from Our Harshest Elements
Most homeowners think gutter cleaning is about aesthetics or maybe preventing a bit of overflow during a storm. That thinking...
Read More

June 19, 2025 - DIY cleaning, Home Cleaning
What to Clean Before Guests Arrive (And What You Can Totally Ignore)
The text notification pops up on your phone: “Can’t wait to see you this weekend!” Your heart does a little...
Read More

June 3, 2025 - Carpet Cleaning, Home Cleaning
5 Simple Steps to Keep Your Cowhide Rug Looking Brand New
There’s something undeniably captivating about a beautiful cowhide rug. Whether it’s gracing your living room floor with its natural patterns...
Read More
May 16, 2025 - Mattress Cleaning, Upholstery cleaning
Steam Cleaning vs Dry Cleaning for Upholstery: Which Is Better?
If you’ve got a well-loved sofa or an armchair that’s seen a few too many movie nights, chances are you’re...
Read More
May 6, 2025 - Spring cleaning, Tips and tricks
How to stop insects from taking over your home naturally and effectively
Why Insects Invade Your Home in the First Place If you’ve ever spotted a trail of ants across your kitchen...
Read More

April 15, 2025 - Carpet Cleaning, Tips and tricks
6 Methods to Remove Crayon From Your Carpet
It happens in almost every home with small children at some point – that heart-stopping moment when you discover bright...
Read More